Using Rekordbox for the first time can be a bit crazy to get to grips with, even after using Serato DJ which I find quite easy to use. Organising music does take some basic knowledge of how Rekordbox works, but once you know a few different ways it starts becoming very easy to organise music.
How to Organise Your Music in Rekordbox?
- Use Columns to A to Z your Music
- ‘My Tag’ your Music
- Intelligent playlists for Automated Organisation
- Categorise Playlists within Folders by genre
- Create Playlists of compatible songs to mix
- Related Tracks for Inspiration
- Use Palette Banks for Quick Access to Music
- Sync Your Music to the Cloud in Rekordbox 6
- Create Playlists in Soundcloud
- Create Playlists in Beatport
Organising music is essential as a DJ. You will need some manual sort of organisation to prepare for particular gigs. Automated organisation can help you with inspiration for your DJ sets. Lets take a look at the top 10 tips to get you up to scratch.
Looking to become better at DJing?
Use Columns to A to Z your Music
The main section on Rekordbox that you can see where your music playlist exists, after you’ve selected a music folder of course.
In the main section you can see a lot of different columns. Now there’s two tips that can help you organise your music from a visual point of view.
Move columns around in the order that suit you
Moving the columns around can help you a lot, especially if you prefer to see the ‘Key‘ of a track or the ‘Label‘ for example.
To achieve this all you need to do is to drag the column and move it to where ever you want it in the order of the table.
For example you might want the preview to be moved out of the way and just focus on the artist name and track names, but also you might want to focus on fields that provide BPM and Key.
Simple hover over the name of the column field name and then left click hold and drag to the new location. See below…
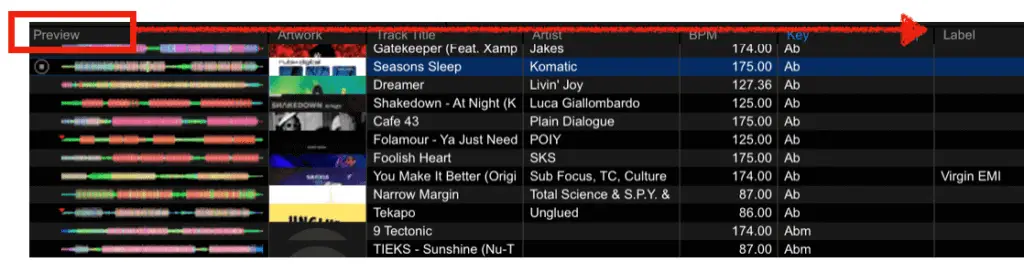
And then afterwards you can see the ‘Preview‘ column is now in a new position. Sorted!

You can do this for all the columns and arrange them however best suits you.
Note: ‘My Tag’, ‘DJ Play Count’ and ‘Date Added’ can help you out in various ways.
- My Tag because if you’ve set my tags for each of your tracks you can start filtering and A-Zing by your tags setup.
- DJ Play Count helps because you can simply highlight which tracks you play the most and helps you to create playlist folders.
- Date Added helps to delete old tracks if you’ve moved folders of music for example.
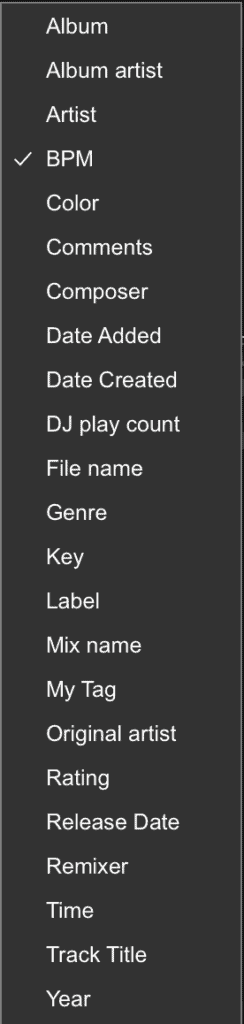
Remove and add columns to suit you
Here are my favourite columns that I use, but you can see that there are plenty to choose from that may suit your DJing style and genre of music that you mix with.
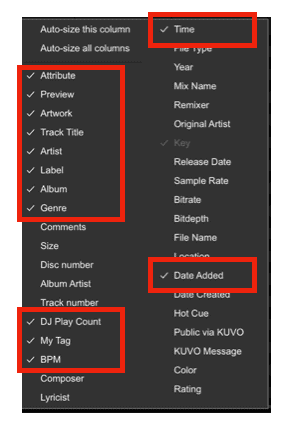
To activate the below Fields menu list, hover over the field name on the playlist and right click. The above menu will appear giving you the option.
Once the menu is visible, you can check or un-check the fields (or columns) that you would like to see in the playlist section.
‘My Tag’ your Music
As mentioned above in the first point ‘My Tag’ is a great field to use in Rekordbox, but only if you’ve put in the initial effort to set up the ‘My Tag’s to be customised for your needs and then subsequently tagged up your music tracks.
Tip: don’t think of ‘My Tags’ as just one tag per track. Think of these tags as multiple tags that can be set for music tracks. Most music genres have different styles or characteristics that you’ll be keen to know about when looking to build your DJ sets.
For example, certain House music has a Disco sound to it, or has vocals and even deep bassline sounds.
There already you have three potential ‘My Tags’ to start adding to your custom tags.
Let’s say we are happy to start adding the three ideas as tags into the custom ‘My Tags’. Here’s how to do that.
Navigate to the far right side-bar of Rekordbox and click on this icon so that it is blue. See the blue tag icon below.

Once you’ve clicked on this icon, you will see a table appear from the right hand-side of the screen.
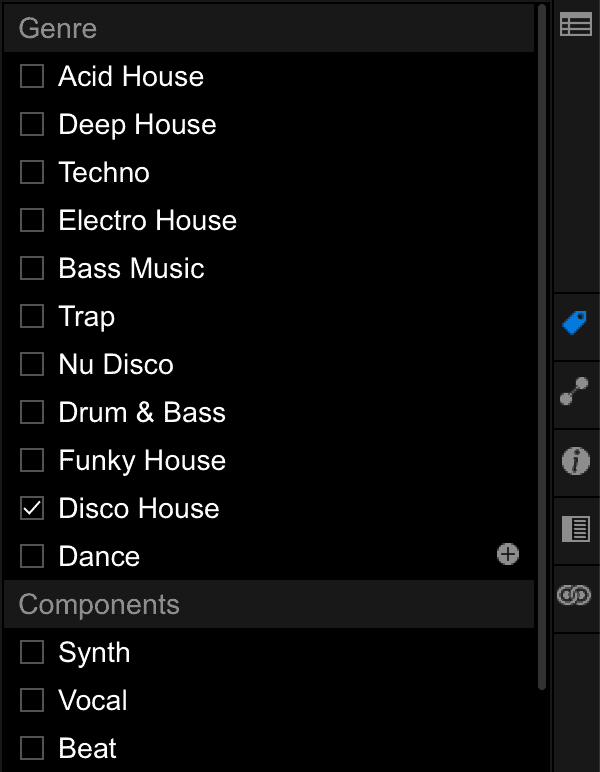
Here you will notice basic standard tags that Rekordbox has already set up. Great! But not good enough. Set up custom ‘My Tags’ to get full customised control over your music within Rekordbox.
To add custom tags into Rekordbox using the above three examples, simply look out for the circled + (plus) sign to add a new tag. Once clicked on the plus sign, enter in the name of the tag.

Once you’ve done that, click on a track in the playlist, you will know that it’s selected as it will be highlighted blue. Then click on the relevant tags that you want to tag the music with. If you’ve got the ‘My Tag’ column open on your playlist, you’ll see this populate.
Take some time to really think about how you want to tag up your music to help you segment and categorise music for future DJ sets in mind. You’ll regret not putting in the effort now to gain the benefits and rewards later on.
Intelligent playlists for Automated Organisation
Intelligent playlists are really helpful now and in the long run.
Setting them up can help automatically apply rules which then narrow down music to a playlist based on the fields/rules that you’ve put in place.
This means that as you build and add new music to your Rekordbox DJ software the intelligent playlists will populate new music based on the rules that you have setup.
Standardised field types and custom fields that you can capitalise on include:
- BPM ranges
- Sub-genre
- Key
Say for example you just want to know the tracks between 110 and 120 BPM, then you can easily do this when using Intelligent Playlists.
The steps to achieve this include the below:
- Click on ‘Playlists’
- Right click on a playlist
- click on ‘Create new intelligent playlist
- type the name of the playlist
- select the relevant fields
- enter in the values
- Then you’re all set > press OK
You can see below here that I’ve set up ab example of the BPM here:

As you can see though, all the options feature all of the columns in the playlist section of Rekorbox, so you really have a lot of options to play around with by setting the different parameters within Intelligent Playlists.
Categorise Playlists within Folders by genre
Similar to Intelligent Playlists there are standard folders that you create manually and populate them with playlists.
Within the playlists you can drag and drop music tracks that you like which is simple enough by dragging music from a folder on your computer to a playlist on Rekordbox.
To create a folder, navigate to the left navigation under ‘Playlists’, right click and select ‘Create new Folder’.
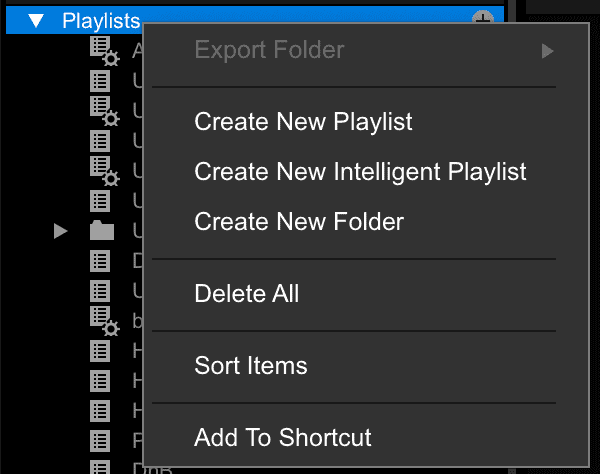
Name this as the main genre of the music, in this instance ‘Dance / House’. Then under there you can create playlists as new and them populate them, or you can simply drag and drop existing playlists within the ‘Dance / House’ folder.
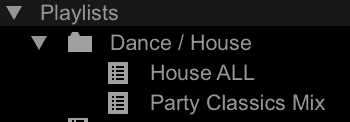
You can create folders do this for multiple genres or even events and then add playlists under each of those folders to help you navigate your music better in Rekordbox.
Create Playlists of compatible songs to mix
One thing to consider doing is if you DJ all types of genres such as a wedding DJ or a mobile DJ, then sometimes you will get a music track that has an interesting beat structure or time signature. Meaning that sometimes it’s really hard to mix in other tracks with it, however only a select few are compatible.
If that’s the case then create a unique playlist that covers the music tracks that are compatible and focus on mixing those specific tracks together when you’re DJing live.
This helps you out to focus on DJing as opposed to simply starring at Rekordbox on your laptop searching for music tracks that are compatible.
Instead you have the time to focus on reading the crowd and change up the vibe for them accordingly.
Related Tracks for Inspiration
Organise your playlists by manually placing tracks into playlists is one method.
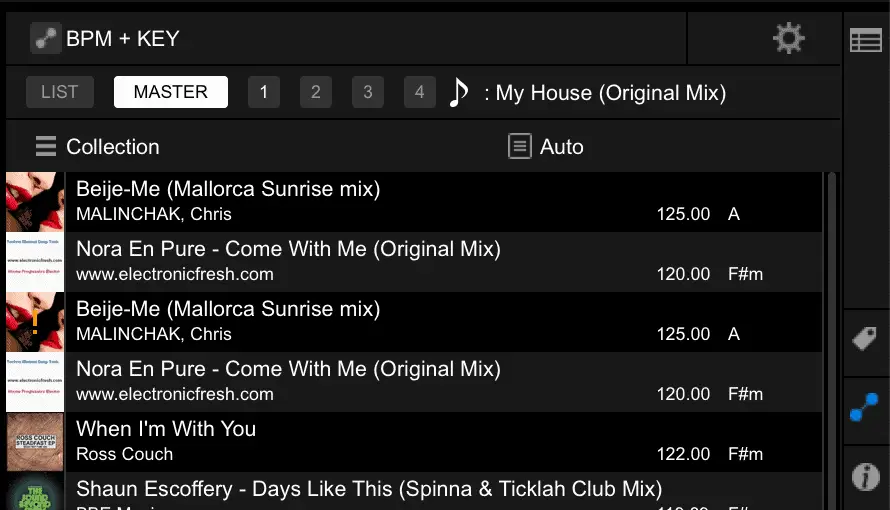
However if you want even more inspiration then what you can do is simply start mixing your music tracks as a whole and see ‘Related Tracks’ section that pops up on the far right of the screen on Rekordbox.
I personally use this method to see which tracks might work well together from a key and BPM perspective. The key changes help to blend and change the energy and mood, while the BPM can help to see the slight nuances in tempo changes throughout the set.
In order to see related tracks, load up a track in one of the slots, start playing the track. What you’ll see once you’ve done this is a range of music that Rekordbox is suggesting that’s compatible.
I click on Master sometimes, but it can help to click on the channel number that you’re playing the track from.
Use Palette Banks for Quick Access to Music
Palette banks are a great way to drop specific playlists that are related to the current main playlist that’s loaded onto your Rekordbox.
In order to access and open palette banks all you need to do is a simple click on the icon below. When the palette is enabled the icon will appear blue in colour.
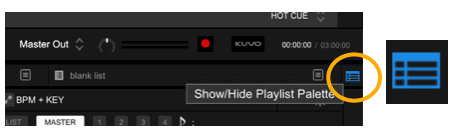
Once activated you’ll see the palette banks appear above the main playlist section.
The palette banks are independent of the main playlist selected, so the main point is that palette banks provide optional extra and easy access playlists this is why they make for great organisation sections in Rekordbox.
See below for palette banks once activated.
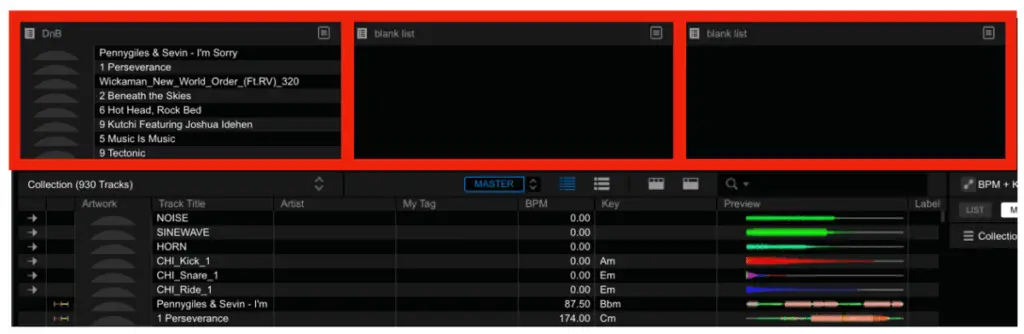
A point to note is that there are various ‘Banks’ of palettes that you can access which activate when you click on the below buttons.

Note that the above blue icon can also hide the palettes if you need to also.
Lastly, it’s worth noting that each palette can be populated with existing playlists that you’ve created already. You can easily populate each palette by dragging and dropping the existing playlist in there OR by dropping in new music tracks which will create a new playlist which you’ll be able to name the playlist.
Sync Your Music to the Cloud in Rekordbox 6

The Cloud option that Rekordbox 6 brings is actually a pretty awesome feature. The service allows you to access and store you music and meta data associated with it in the cloud.
What’s more impressive is that you can backup your music on top of your normal backing up process e.g. external hard drive.
In terms of organisation, that feature that I’m most impressed with is that you can organise your Rekordbox library independent of the device that you’re working with. For example you can organise your music library playlists using you mobile phone and then access those same playlists using your laptop to start DJing with live.
Further organisation can be gained using multiple devices by adding and editing cue points set for your music tracks.
Create Playlists in Soundcloud
Further organisation can be gained by creating playlists or accessing your existing playlists setup in Soundcloud.
I find that the phone app of Soundcloud is sometimes easier to use when creating playlists but this is my personal preference.
Accessing the Soundcloud account in Rekordbox is easy, all you need to do is click on Soundcloud option in the far left of Rekordbox, login and then your sorted!
You will now be able to access your playlists setup in Rekordbox. Now you have even more organised playlists available in Rekordox.
Note: you won’t be able to edit playlists within Rekordbox for any playlists that are available from Soundcloud. You have to go into Soundcloud or Soundiiz to edit or remove tracks.
Create Playlists in Beatport
Similar to the above point, you can login to Beatport and access your already curated playlists of all your DJing tracks. The same process for logging in is achieved as Soundcloud.
This is another great way to gain further organisation of playlists helping you DJ with all your favourite tracks and genres.
There are a lot of great music tracks available in Beatport which can make for some great playlists for you to use for DJing with.
Related Questions
How do I transfer Rekordbox library?
Click on preferences, then click the advanced tab, click ‘Move Database’, then select the new location from the drop down menu, finally click OK. Double check that the main selection is showing the desired drive, if not, then click on the correct drive and click OK.
