If you’re getting back into DJing with record vinyls or keen to get started DJing vinyls, then you’re in the right place. This is a QUICK START guide for you to kick start your skills DJing with vinyls.
Assuming that you’ve already got your DJ mixer and vinyl turntables setup ready to mix and blend, then let’s get stuck into this guide.
Check out the equipment that you need for DJing record Vinyls (in DVS), check out this article.
Also here are some awesome tips for DJing better with record vinyls.
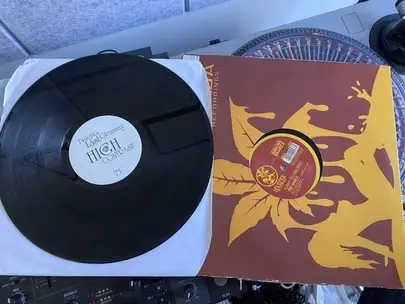
1. Pick two record vinyls (exact same genre)
The benefit of mixing two music tracks over and over, is that you really get to know the ins and outs of the musical structure of both tracks.
The added benefit is that you’ll start to instinctively know where to cue up and drop the track to start beatmatching.
My advice here is to pick music that is within the same genre and both tracks have the same beat pattern (AKA beat structure). As in, both tracks have the same pattern of where the kicks and snares are hitting.
Beat matching by ear can be tough to learn in the beginning, so make it easier by picking two tracks that have the same beat patterns.
If you want to check out how to DJ specific genres, here are two great articles and videos to get you started.
2. Practice cueing up the first beat
Catch the first beat of one of your record vinyls, right at the beginning of the record would be ideal and most simple for yourself.
If there’s not a kick drum at the very beginning of the music track then you can skip ahead and find the first initial kick drum.
Remember this cue point so that you can come back to this as the ‘main’ cue point time and time again.
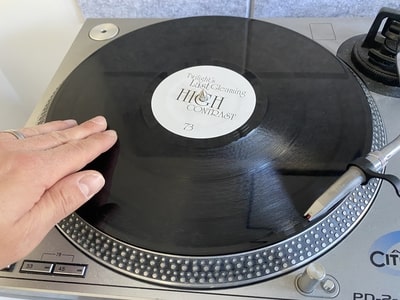
While the other track is playing out, practice cueing up by moving the record vinyl that’s not playing by holding onto the vinyl and using your hand to move the vinyl back and forth.
Once you’re ready, release the vinyl and let it play.
The beats of both tracks should align quickly (you will be able to hear this in your DJ headphones) however both beats might go out of sync very quickly.
This is when you need to use the ‘Pitch Shift‘ to get the correct tempo of the record vinyl you’ve just dropped in.
Now quickly onto step 3.
3. Beat match using pitch shift and platter

There’s two parts to beat matching.
- Phase 1: Getting the two beats in sync with one another e.g. using the pitch shift (see Tips below).
- Phase 2: Dropping the track in and simply make minor adjustments to the platter or the pitch shift.
Phase 1, What will happen is that you’ll usually achieve Phase 1 in conjunction with step 2 (see above).
When you’re cueing up a track it’s quite easy (once you’re good at beat matching) to quickly sync up the tracks. Remember it doesn’t necessarily matter when you cue up and start beat matching initially, Phase 1 is initially all about getting two beats aligned.
Phase 2, is all about picking the right part of the music track to drop in your new record vinyl you’re about to mix in.
Phrase matching is key here, so make sure you mix in at the beginning of a phrase. Your mixes will sound really smooth if you can phrase match.
See an easy way to do this in Step 4.
Tips for Beat Matching
- Use your hand to slow down the record vinyl by lightly touching the side of the platter (the metal part).
- To speed up twist the pin in the middle of the record vinyl clockwise slightly to speed up the track. Remember to adjust the pitch shift accordingly if the track starts to slip back out of sync.
- Quickly whip the pitch shift up and then back down to adjust the speed ever so slightly. This can help remove the slurring sounds of using the previous techniques mentioned above.
- Using your headphones, try to really focus your mind (shut your eyes) by separating the two music track sounds and really hone in on whether the track you’ve just dropped in is slower or faster. Use the techniques above to adjust the tempo accordingly.
Do YOU want to quickly learn how to DJ, to a high level?
https://learn.beatmatchguru.com
4. Cue first beat on the live tracks “Drop”
Once you’re satisfied that both tracks are in sync with one another. Then move onto the below.
Keep it simple.
Let’s use the cue point identified in the previous section.
And just simply cue up and release the track for beat matching on the existing tracks second “drop”.
“drop” = where the first beat of a bass line kicking in starts
Why do this?
Like I said, this is a quick start guide for DJs getting into DJing record vinyls.
It’s a great way to practice beat matching initially and take your mind away from where to drop, and just focus on a simple technique to get beat matching as soon as possible.
I’m NOT advocating for all of your mixes just cueing up tracks by mixing from the second drop. There are way more points in songs to start mixing in from, the choice is yours and yours to find out.
Beat matching tweaks
Remember, when you drop in the track, there might be some slight adjustments that you need to make. Refer back to the ‘Tips for Beat Matching’ in the previous Step 3.
5. Mix and blend using the cross fader
Now it’s transition time.
Using the cross fader you can now switch over slowly and smoothly over to the next track. Remember to smoothly switch over on the last beat of the phrase in which you’re mixing.
Using the EQ switches (High, Med and Low) is very common when transitioning over to a new track in the mix. EQ blending can really help cut away frequencies that might muddy the mix, making the mix sound clearer for your listeners, not to mention you’ll enjoy hearing the mix at this point too.
See below for some EQ mix techniques (appreciate the below DJ equipment is a DJ controller, however the techniques can be learnt and applied to a mixer you’re using to DJ record vinyls.
Final Thoughts
Obviously the process above was simply for mixing two tracks together. At some point you will likely get bored of DJing just the same two tracks, so it’s time to build a DJ set. Maybe around 10 to 20 tracks can give you a decent DJ set to start mixing. Check out some great advice here on How to Find Songs That Mix Well Together.
When mixing record vinyls, it’s really important to not get too carried away and start leaving vinyls everywhere, I’ve done this in the past and I’ve found that my records get damaged. Be organised and put your records back in the sleeves in which they came in. End result, no skipping of records when you’re in the mix. It can be very embarrassing when in the mix and the records skip out of sync.
Check out my top article on DJing with Record Vinyls here. Lots of great tips for your record Vinyl DJs.
Related Questions
How do you DJ with laptop and vinyl?
Acquiring DVS equipment to plug into a DJ mixer and turntables will allow for connecting to a laptop that has DJ software on it. DVS equipment includes a Audio Interface and Digital Timecode vinyls, see here for more information on DVS setup and DJing.
