
I’ve recorded many a mix in my time and experienced different outcomes with varied techniques. Below are some of the techniques for recording your DJ mixes that I’d like to share. I’ve rounded up some of techniques used in the past and also some new ideas that you can adopt for when you’re on the move or at home.
How to Record Your DJ Mixes?
- DJ Software e.g. Serato
- Audio Recording Software e.g. Audacity
- DAW Software e.g. Ableton
- Portable Recording Devices e.g. Zoom H4n Pro
- Smart Phone e.g. Samsung
- USB Output to Laptop e.g. Pioneer Mixer
Before we get stuck into the different options for recording a DJ mix, here’s the top line process that you’ll need to follow in order to achieve recording any DJ mix.
Process for Recording a DJ Mix
Before going into any detail of which method and software to use, it’s worth noting the below overall steps that you need to take. These are a set of guidelines to give you an idea of what you need to do
Outputs, Connections & Equipment Setup
Before we explore the different options for recording a mix it’s really important to consider the connection type. Setup of equipment can really enhance the quality of your mixing. The two options below can be adopted but incur different quality and costs.
- Direct from mixer to laptop – Using a Y cable connected to the phono outputs of your mixer to the mini-jack of your laptop line in. Cheap and easy option, but can lower quality of sound recording due to a humming sound underlying in the recording.
- Connect mixer to audio interface then to laptop – At a cost, it’s possible to connect to an audio interface which dramatically improves the quality of sound passing to the computer that you’re recording on. An example of an ‘External Audio Interface’ is the Reloop Iphono 2 or Focusrite Scarlett 2i2 3rd Gen.
- USB from Mixer – Easy option for a decent quality digital audio recording. Just make sure the audio drivers that come with the mixer e.g. Pioneer are installed. This then allows you to record direct to your laptop.
Most of the options and techniques below can be recorded via either option highlighted above, direct cable or audio interface. If you want to record your DJ mixes for fun then it’s easily done for cheap.
If you’re looking to step up your game and promote yourself as a DJ then investing in extra equipment will likely be invaluable for quality and time saving in post editing. Greater quality recordings will appear more professional to your listeners, investing in higher quality equipment could pay off if you get DJ sets out of it.
Option 2 is more expensive in comparison as an external soundcard will cost you around £20-500. The quality of sound is far greater due to a cable usually causing a humming sound in the background. Highly annoying.
I highly advise exploring getting an audio interface to plug into from the mixer which then connects to the laptop. This massively reduces the risk of a humming sound when recording is more likely to happen if you have setup an audio interface.
Sound Check
To get the best out of your mixing sessions, make sure beforehand that you test the sound and that there’s input being received. You’ll most likely see this on a monitor level on an audio interface and software. Keeping the levels will allow for no distortion and better quality audio. Also allowing for some headroom gives some post recording mastering.
Test Recording
No matter what you do, it’s really important to run a test recording to see if everything works all ok. Trust me when I say this, I’ve not tested a recording before actually mixing a DJ set then to my annoyance the recording didn’t actually record.
Just because the monitor is showing levels, it doesn’t always mean the sound is going to record. (FYI my recording failure happened on Serato DJ software). Also another point to add is that it’s advisable to record at 24 bit / 44.1 kHz to allow for the best flexibility of the audio file later on.
Record
When you’re ready, go ahead press record and start mixing. I would say that it’s highly beneficial to keep an eye on the trim/gain for each track that you mix.
Keep out of the red! It’s actually great practice for when you’re out DJing and performing live in front of a crowd. The quality of the recorded mix will be much consistent in audio quality and levels. Master keeping out of the red and you’ll save yourself going red in the face with embarrassment.
Audio Edit
If you’re recording onto an audio recording software such as Audacity or a DAW software then great! Your recording is already in the software and you can quickly edit the beginning and end of your mix. Usually I cut out any silences at either side of the audio file so that the mix starts and ends swiftly for listeners.
Master
Add that professional touch to your final audio file with mastering. Depending on what the audio file is looking like in Audacity or DAW software will likely determine what techniques you’ll need to apply.
Normalisation, compression, EQ and manual editing of levels are all areas that can help to put the final touches to a professional sounding mix.
- “Normalise” can apply a quick boost to the volume of the overall mix especially helpful if it’s too quiet.
- “Compression” can be applied very lightly at around a 2:1 compression ratio. Too much compression can zap the life out of the dynamics of all the songs in the mix. Remember all songs that you mix have already been post edited.
- “EQ” can be manually added using automation with a DAW software. EQ tweaks will resolve any peaks and spikes in sound, especially at points in the mix where two tracks are being mixed together. The end result will be much more pleasant to the listeners ears.
- “Manual automation of volume” will help compliment EQ related tweaks.
There’s a great service online that I believe it’s possible to get a free ‘master’ of your audio file. The website is called Landr, check it out here.
Once you’re done with the audio editing and final mastering, now export the audio file to a desired file format such as Wav or MP3 ready for promoting your mix.
Looking to become better at DJing?
Techniques to Record Your DJ Mixes
- DJ Software e.g. Serato
- Audio Recording Software e.g. Audacity
- DAW Software e.g. Ableton
- Portable Recording Devices e.g. Zoom H4n Pro
- Smart Phone e.g. Samsung
- USB Output to Laptop e.g. Pioneer Mixer
1) DJ Software (Serato)
Digital DJing has taken off dramatically and it’s no surprise that many a DJ these days uses DJ software such as Serato, Rekordbox or Traktor.
It’s possible to use the recording function within DJ software, such as Serato in the below example. This makes for very easy recording of your DJ mixes. Believe it or not, it’s actually possible to record a video DJ mix.
Serato Recording Process

- Assuming that Serato DJ is all setup and you’re already been mixing it up. Then follow the below steps to record a mix.
- Before recording, click on ‘SETUP’ far right.
- An options table will appear, you can then select the file output of your recording. My advice here is to select ‘WAV’ & ’24 Bit’ for now.
- Look for REC at the top of the software, click on the link.
- You’ll then see a drop down just below the digital turntables offering more button options e.g. REC, level adjust etc.
- On the far left drop down, make sure that “Mix” is selected.
- Select your ‘Record Location’, this will be where your final mix audio file will be saved on your computer. Advice here is to save it to an external hard drive to save space on your computer.
- There’s a level wheel next to a monitor, play each of the turntables separately to adjust accordingly and allow for some headroom so that there’s no red on the monitor.
2) Audio Recording Software – Audacity
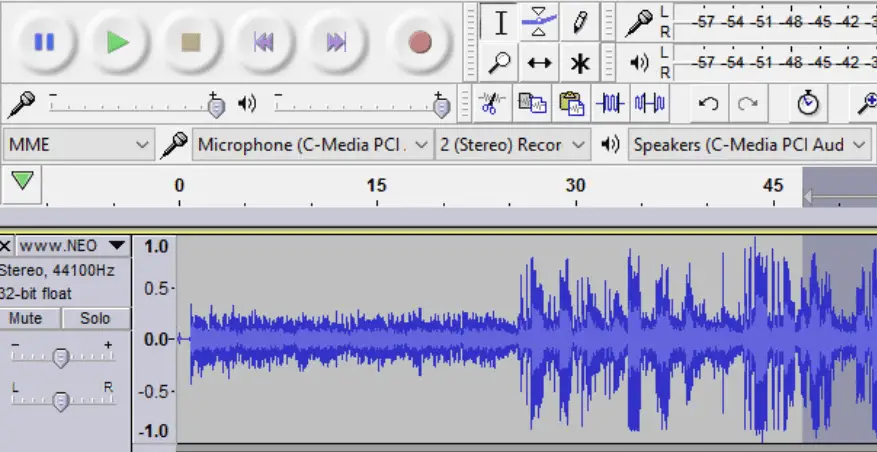
Audacity is an open-source audio software that can be downloaded for free and be used for recording and editing audio files. It’s compatible for both macOS and Windows operating systems so is accessible for the majority.
Good points about this option to record your DJ mixes is that it’s FREE. Also it offers a very decent range of post editing effects to apply to your mix for that professional touch and finish. It’s great for beginners and for more advanced users. From experience I’ve used it for both podcast editing of audio, recording DJ mixes and also for music production to master audio files.
The only downside that I find only slightly annoying is that you have to download extra files. For example the Lame Encoder to allow you to export in different audio file formats. A small price to pay by way of effort for such an amazing FREE open-source bit of audio editing software.
Remember using an external audio interface will help record a clean high quality sound arriving from the DJ mixer to the laptop.
Audacity Recording Process
- Download both Audacity and Lame Encoder. The Encoder will allow for you to save your files in MP3 as an option. MP3 files are much lower in size to Wav files and allow for uploading and sharing your mix a lot easily.
- Once installed, open Audacity and click File > Preferences.
- Look for the input drop down menu at the top of Audacity, select the soundcard or line in that you require.
- Test the input is working correctly by playing one of the decks. You should see the volume level in green/yellow (potentially red if the signal is too strong)
- Once you’re ready to start recording, click on the round red circle button to record.
- Start mixing.
- Once finished mixing, click on stop, the button with a yellow square.
- To save, click File > Export as MP3.
- Options will appear for you to enter in audio meta data, then click save.
There you have it, your own recording of a mix.
3) DAW Software
As mentioned above using an external audio interface will help record a clean high quality sound arriving from the DJ mixer to the laptop.
Very similar to Audacity, a DAW stands for Digital Audio Workstation. Typically DAW software is used for music composition of all types of audio, for example live recordings and digital VSTs.
Based on this fact, DAWs are highly suitable for recording a mix, especially because there are extra features on there to allow you to post edit your software and export different audio file formats super easy. (Easier than Audacity as you don’t need to mess around with downloading separate encoders etc).
Usually, if you have a MAC, Garageband is a pre-installed software. This is great because it’s a free and you can record onto it really easily. Ableton sometimes comes free with a piece of music related equipment, e.g. a DJ mixer (DVS enabled) or Beatpad by AKAI.
In this example lets look at the steps to recording a mix via Ableton.
Ableton Live Recording Process
- Firstly, setup your inputs by clicking on File > Preferences
- On the Audio tab, on the ‘Audio Input Device’ select the correct input device in the drop down.
- Then click on the ‘Input Configuration’ button. Select one of the ‘Stereo’ options, usually speaking you can select 5/6.
- Once that’s done, now make sure you open the audio track settings to check that you’ve got the correct ‘Ext. In’ and ‘Stereo’ option selected, also select the recording button in red too.

- If you play one of the turntables, you should see the monitor levels moving up and down. This is a good sign. This means that you’re ready to test out a recording.
- At the top of Ableton Live, select the main record button, then press play to allow a recording to happen. Just check the levels are not clipping and adjust the master level appropriately.
- Then you’re done, you can start recording your final version of the DJ mix. Export and save as your desired file format.

4) Portable Recording Devices
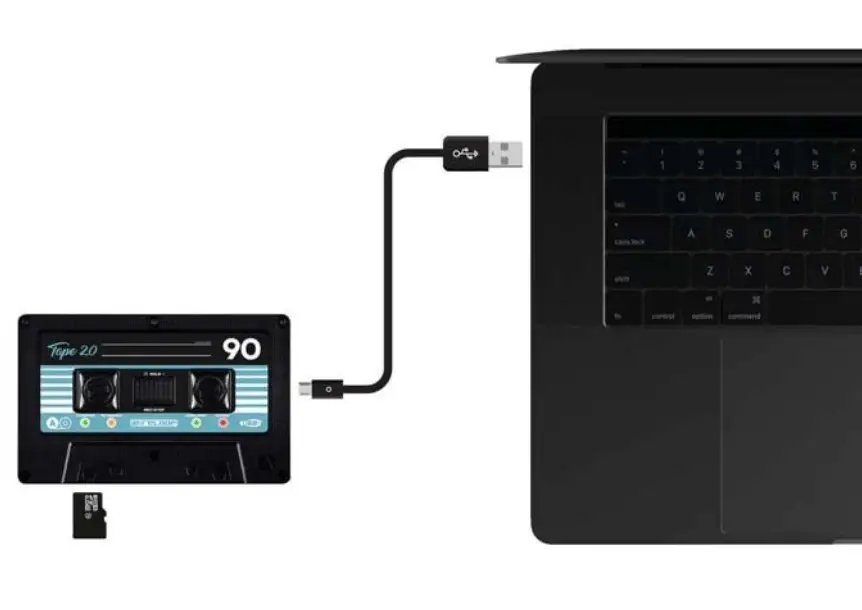
Portable audio recording devices are another option for DJs on the move. Especially if you’re DJing in different venues, festivals and even on radio. Popular recording devices that I’ve seen on the market are the ‘Reloop Tape 2‘ and ‘Zoom H4n Recorder‘. For me the Reloop looks the best and has a GND grounding post, however
Reloop Tape 2 Recording Process
- Select either MP3 or Wav on the selector button.
- Plug in a phono to mini jack cable into the device from the mixer.
- Select ‘Line’ input next to the mini jack input.
- Click record and start your DJ mix, and again once you’ve recorded your set.
- You can then export your DJ mix onto a computer via an SD Card if you’ve inserted one into the device or transfer directly from the Reloop into your computer.
The above process is not far off recording a DJ mix using another audio recording device. Just always get the correct cables to connect to a mixer or DJ controller, test that the input is working and review the monitor levels before recording.
5) Smart Phone
Depending on which type of phone you have, Android, iPhone etc, you’ll need to download a recording App to your phone first. This will allow you to then connect your phone to a mixers recording output via a 3.5mm mini-jack male to 2 RCA male.
An example of an App for iPhone is the new App from Pioneer, DJM-REC. There’s a clever little feature that used the limiter from the DJ mixer to control audio recording levels below distortion. This can be utilised by plugging in a USB cable to allow for recording. I’ve not used this myself however looks like a decent app if you have a Pioneer mixer. Bit annoying that they charge £9.99 for it.
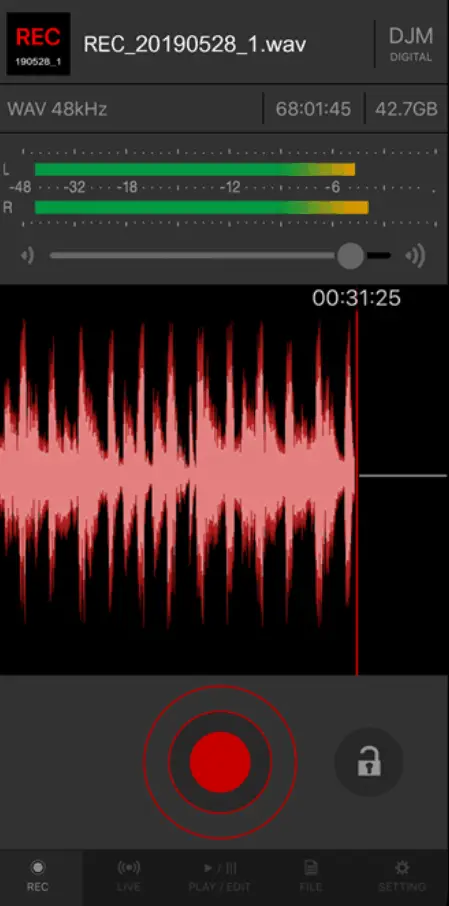
Once this is setup then test that the levels are being received from the mixer. Adjust your levels accordingly, then you’re away! Press record on the App and then start your mix. Recording on your phone is great as it’s easily transferable to your laptop via Google Drive or DropBox for example. That way you can post edit your audio in Audacity if you feel you need to.
6) USB Output to Laptop
Digital audio can be recorded in real time to you laptop from a mixer recording output. This makes it super easy for you to record your mixes. This just means that you need to invest in a high spec mixer like Pioneer for example. The other limitation of relying on this option is that you’d likely need to use an alternative method if you wanted to record DJ mixes on the go.
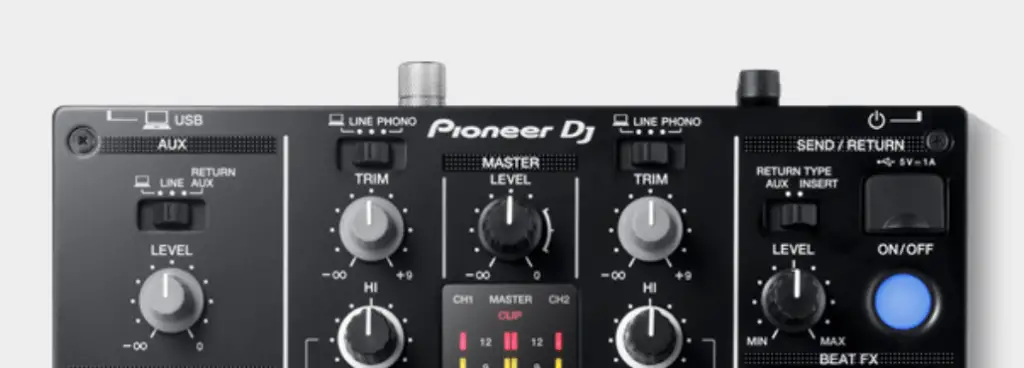
Make sure you have any software of drivers that come with the mixer to be installed onto the laptop that you intend to record on. Then you’ll be able to edit any settings to allow for outputs to be sent to the USB, such as REC out.